安装
|
1 2 3 4 5 6 |
# 安装 Docker curl -fsSL https://get.docker.com | bash -s docker --mirror Aliyun sudo usermod -aG docker $USER # 配置文件镜像加速: /etc/docker/daemon.json {"registry-mirrors":["https://hub-mirror.c.163.com/"]} systemctl start docker |
Golang容器编译程序
|
1 2 3 4 5 6 7 8 9 10 11 12 13 |
docker pull golang:1.15.12-alpine3.13 docker run --rm -it golang:1.15.12-alpine3.13 go env docker run --rm -it \ -v /path/xxx:/app \ -v /xxx/gopath:/go \ -w /app/src \ # 假设main.go及go.mod放在/path/xxx目录下 -e CGO_ENABLED=0 \ # 如在 alpine 中执行可不指定 -e GOPROXY=https://goproxy.cn \ golang:1.15.12-alpine3.13 \ go build -o ../path/xxx main.go # golang.org/x/crypto/ssh |
Docker API
|
1 2 3 4 5 6 |
# 配置文件/usr/lib/systemd/system/docker.service中的ExecStart最后面添加-H tcp://0.0.0.0:2345 ExecStart=xxxxx -H tcp://0.0.0.0:2345 # 这里开放访问,请自行进行局域网或其它权限限制 sudo systemctl daemon-reload sudo systemctl restart docker # 验证命令 docker -H tcp://ip.address.xxx:2345 ps |
官方 SDK说明:https://docs.docker.com/engine/api/sdk/
Vagrant
允许密码登录
|
1 2 3 4 5 |
sudo vim /etc/ssh/sshd_config #取消注释 PasswordAuthentication yes #重启 sudo systemctl restart sshd |
Nginx
|
1 |
docker pull nginx:1.21.0-alpine |
在线生成配置文件:
安装Rancher
Rancher 有两个版本:1.x和2.x,其中1.x 主攻容器编排,2.x 主攻 K8S 集群部署相关:
https://rancher.com/docs/rancher/v2.x/zh/
Rancher 1.x 文档:https://rancher.com/docs/rancher/v1.6/zh/
多主机添加 host时第一个主机(本机)可能需自行添加-e CATTLE_AGENT_IP=xx.xx.xx.xx
一些准备工作:
|
1 2 3 4 5 6 7 |
# 关闭防火墙 systemctl stop firewalld && systemctl disable firewalld # 关闭 SELinux setenforce 0 sed -i 's/SELINUX=enforcing/SELINUX=disabled/g' /etc/selinux/config # 关闭swap swapoff -a |
这里在主机上使用了8080和8443端口进行映射,如果该主机仅用作部署 Rancher,可以直接使用80和443端口:
|
1 2 3 4 5 |
sudo docker run -d --privileged --name=rancher \ --restart=unless-stopped \ -p 8080:80 -p 8443:443 \ -v /home/xxx/rancher:/var/lib/rancher \ rancher/rancher:stable |
|
1 2 3 4 5 6 7 8 9 10 11 12 |
docker run -d \ --name rancher_server \ --restart=unless-stopped \ -p 80:80 \ -p 443:443 \ -v /etc/rancher/ssl/tls.crt:/etc/rancher/ssl/cert.pem \ -v /etc/rancher/ssl/tls.key:/etc/rancher/ssl/key.pem \ --privileged \ rancher/rancher:v2.5.8 \ --no-cacerts docker logs rancher_server 2>&1 | grep “Bootstrap Password:” |
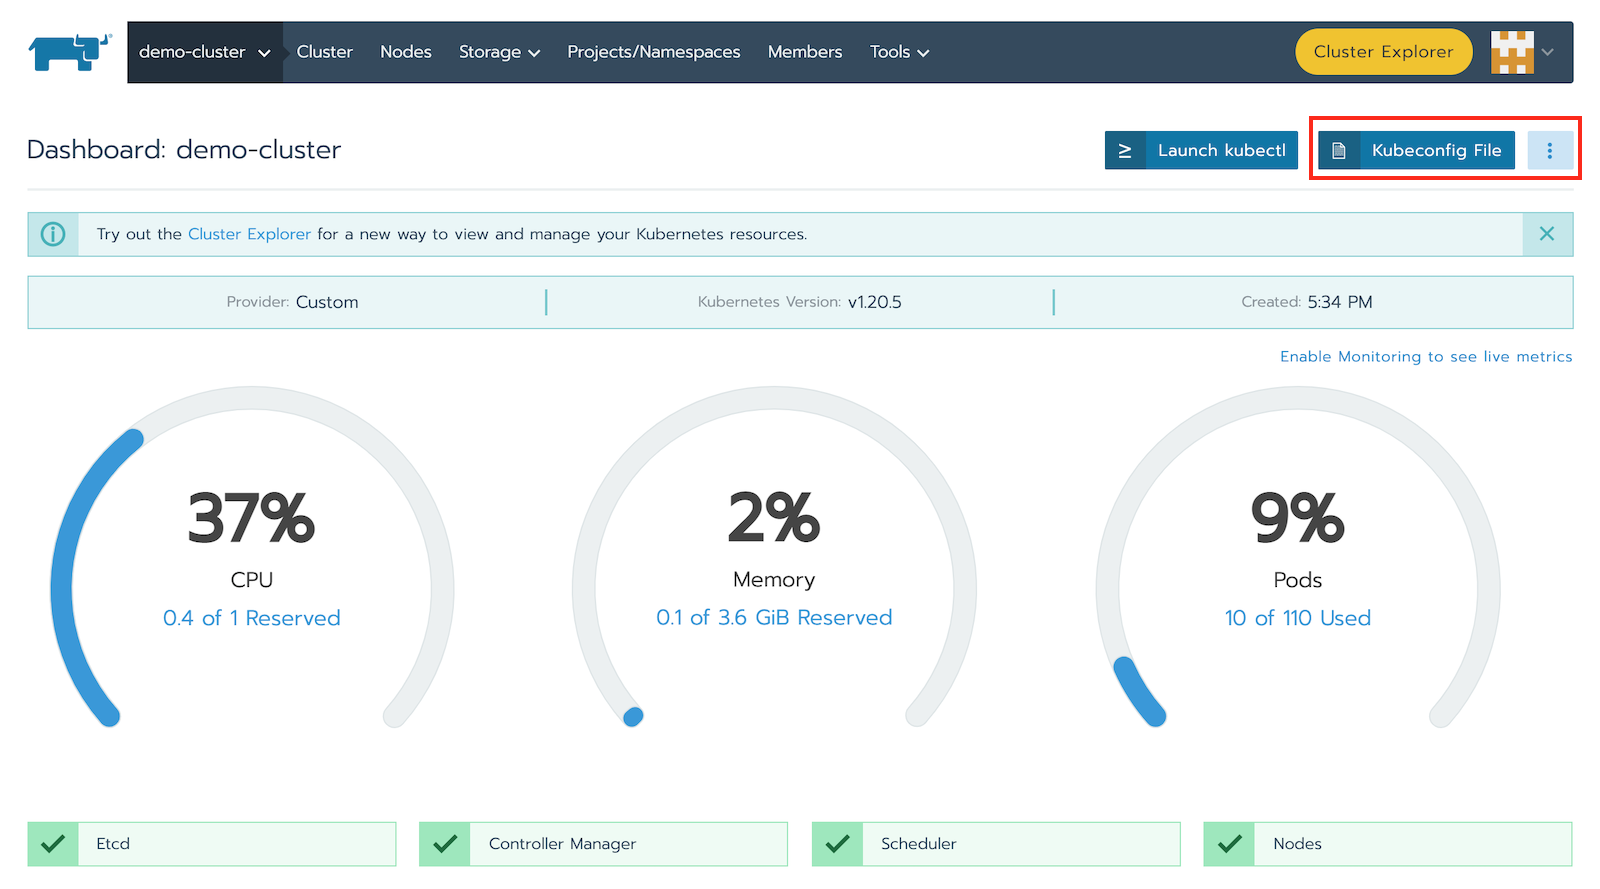
在 Rancher 内创建一个集群以供测试,首次创建会需要花费几分钟。通过所创建的集群拷贝配置内容(点击图中 Kubeconfig File),添加至~/.kube/config或在其它路径中创建配置文件并通过KUBECOFIG环境变量进行指定:
创建集群过程中如出现 etcd 关于证书的报错(tls: failed to verify client’s certificate: x509 etcd rancher),可删除重建。
nfs
|
1 2 3 4 5 6 7 8 9 10 11 12 13 14 15 16 17 18 19 20 21 22 23 24 25 26 27 28 29 30 31 32 33 34 35 |
sudo yum -y install nfs-utils #sudo vi /etc/sysconfig/nfs LOCKD_TCPPORT=30001 #TCP锁使用端口 LOCKD_UDPPORT=30002 #UDP锁使用端口 MOUNTD_PORT=30003 #挂载使用端口 STATD_PORT=30004 #状态使用端口 sudo systemctl restart rpcbind.service sudo systemctl restart nfs-server.service sudo systemctl enable rpcbind.service sudo systemctl enable nfs-server.service #ubuntu 服务端 sudo apt install nfs-kernel-server # ubuntu 客户端 sudo apt install nfs-common # sudo vi /etc/exports /home/xxx/xxx 172.17.70.0/24(rw,async,insecure,no_root_squash) # 重启服务 # 其它主机的挂载操作 sudo yum -y install nfs-utils # 查看 showmount -e 172.17.70.145 # 尝试进行挂载 mount -t nfs 172.17.70.145:/home/xxx/xxx /home/xxx/xxx # 卸载 sudo umount /home/xxx/xxx # sudo vi /etc/exports /home/xxx/xxx 172.17.70.0/24(rw,async,insecure,no_root_squash) # 使配置生效 exportfs -a |
- root_squash(默认):将来访的root用户映射为匿名用户或用户组;
- no_root_squash:来访的root用户保持root帐号权限 ;
- no_all_squash(默认):访问用户先与本机用户匹配,匹配失败后再映射为匿名用户或用户组;
- all_squash:将来访的所有用户映射为匿名用户或用户组;
- secure(默认):限制客户端只能从小于1024的tcp/ip端口连接服务器;
- insecure:允许客户端从大于1024的tcp/ip端口连接服务器;
- anonuid:匿名用户的UID值,通常是nobody或nfsnobody,可以在此处自行设定;
- anongid:匿名用户的GID值;
- no_subtree_check:如果NFS输出的是一个子目录,则无需检查其父目录的权限(可以提高效率)
kuberctl
以1.20在Linux 上的安装为例,访问 GitHub下载对应版本
|
1 2 3 4 5 |
tar -zxvf kubernetes-client-linux-amd64.tar.gz sudo mv kubernetes/client/bin/kubectl /usr/local/bin/ # 查看配置和集群信息 kubectl config view kubectl cluster-info |
kubelet api命令 操作
|
1 2 |
docker exec -it kubelet curl -k https://localhost:10250/healthz \ --header "Authorization:Bearer <替换为Kubeconfig文件中的token>" |
/healthz 之外还有/pods, /stats/summary, /metrics等API
常见问题
1.Invalid username or password. Please try again.
|
1 |
docker exec -it <container_id> reset-password |
2.Unable to authenticate the request due to an error: x509: certificate has expired or is not yet valid
这一问题网上的解决方案颇多,主要原因为证书实际有效期为一年,官网对于2.4+有一个解决方案在2.5.x 中实测有效,注意其中一次对服务的重启
|
1 2 3 4 5 |
kubectl --insecure-skip-tls-verify -n kube-system delete secrets k3s-serving kubectl --insecure-skip-tls-verify delete secret serving-cert -n cattle-system rm -f /var/lib/rancher/k3s/server/tls/dynamic-cert.json # 重启rancher-server curl --insecure -sfL https://server-url/v3 # 刷新参数 |
2.6版本未实测,解决方案为:
|
1 2 3 |
kubectl delete secret -n cattle-system cattle-webhook-tls kubectl delete mutatingwebhookconfigurations.admissionregistration.k8s.io --ignore-not-found=true rancher.cattle.io kubectl delete pod -n cattle-system -l app=rancher-webhook |
3.certificate signed by unknown authority (possibly because of \”crypto/rsa: verification
|
1 |
sudo rm -rf /etc/kubernetes/ /var/lib/kubelet/ /var/lib/etcd/ # 会丢失数据 |
4.拉取私有仓库报错:repository does not exist or may require ‘docker login’: denied: requested access to the resource is denied
|
1 2 |
sudo docker login ... sudo cp ~/.docker/config.json /var/lib/kubelet/config.json |
5.curl failed to verify the legitimacy of the server and therefore could not establish a secure connection to it
在curl命令添加参数-k


